Disclosure: This post contains affiliate links, and we may receive compensation if you click a link and buy a product we recommend. This comes at no extra cost to you! We only recommend gear we absolutely love (and think you will too!).
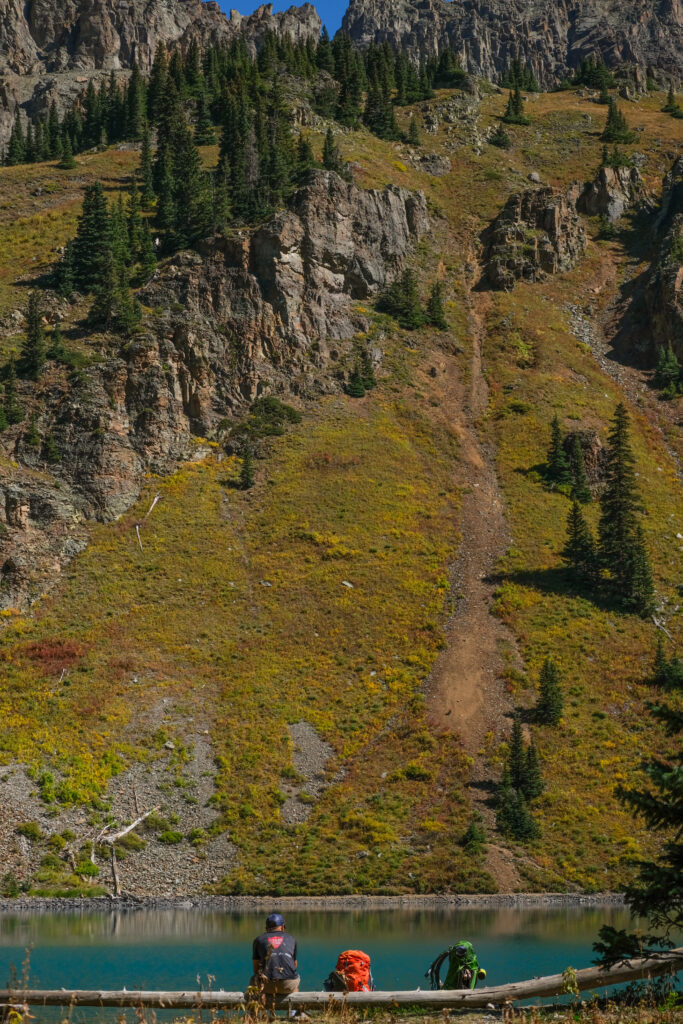
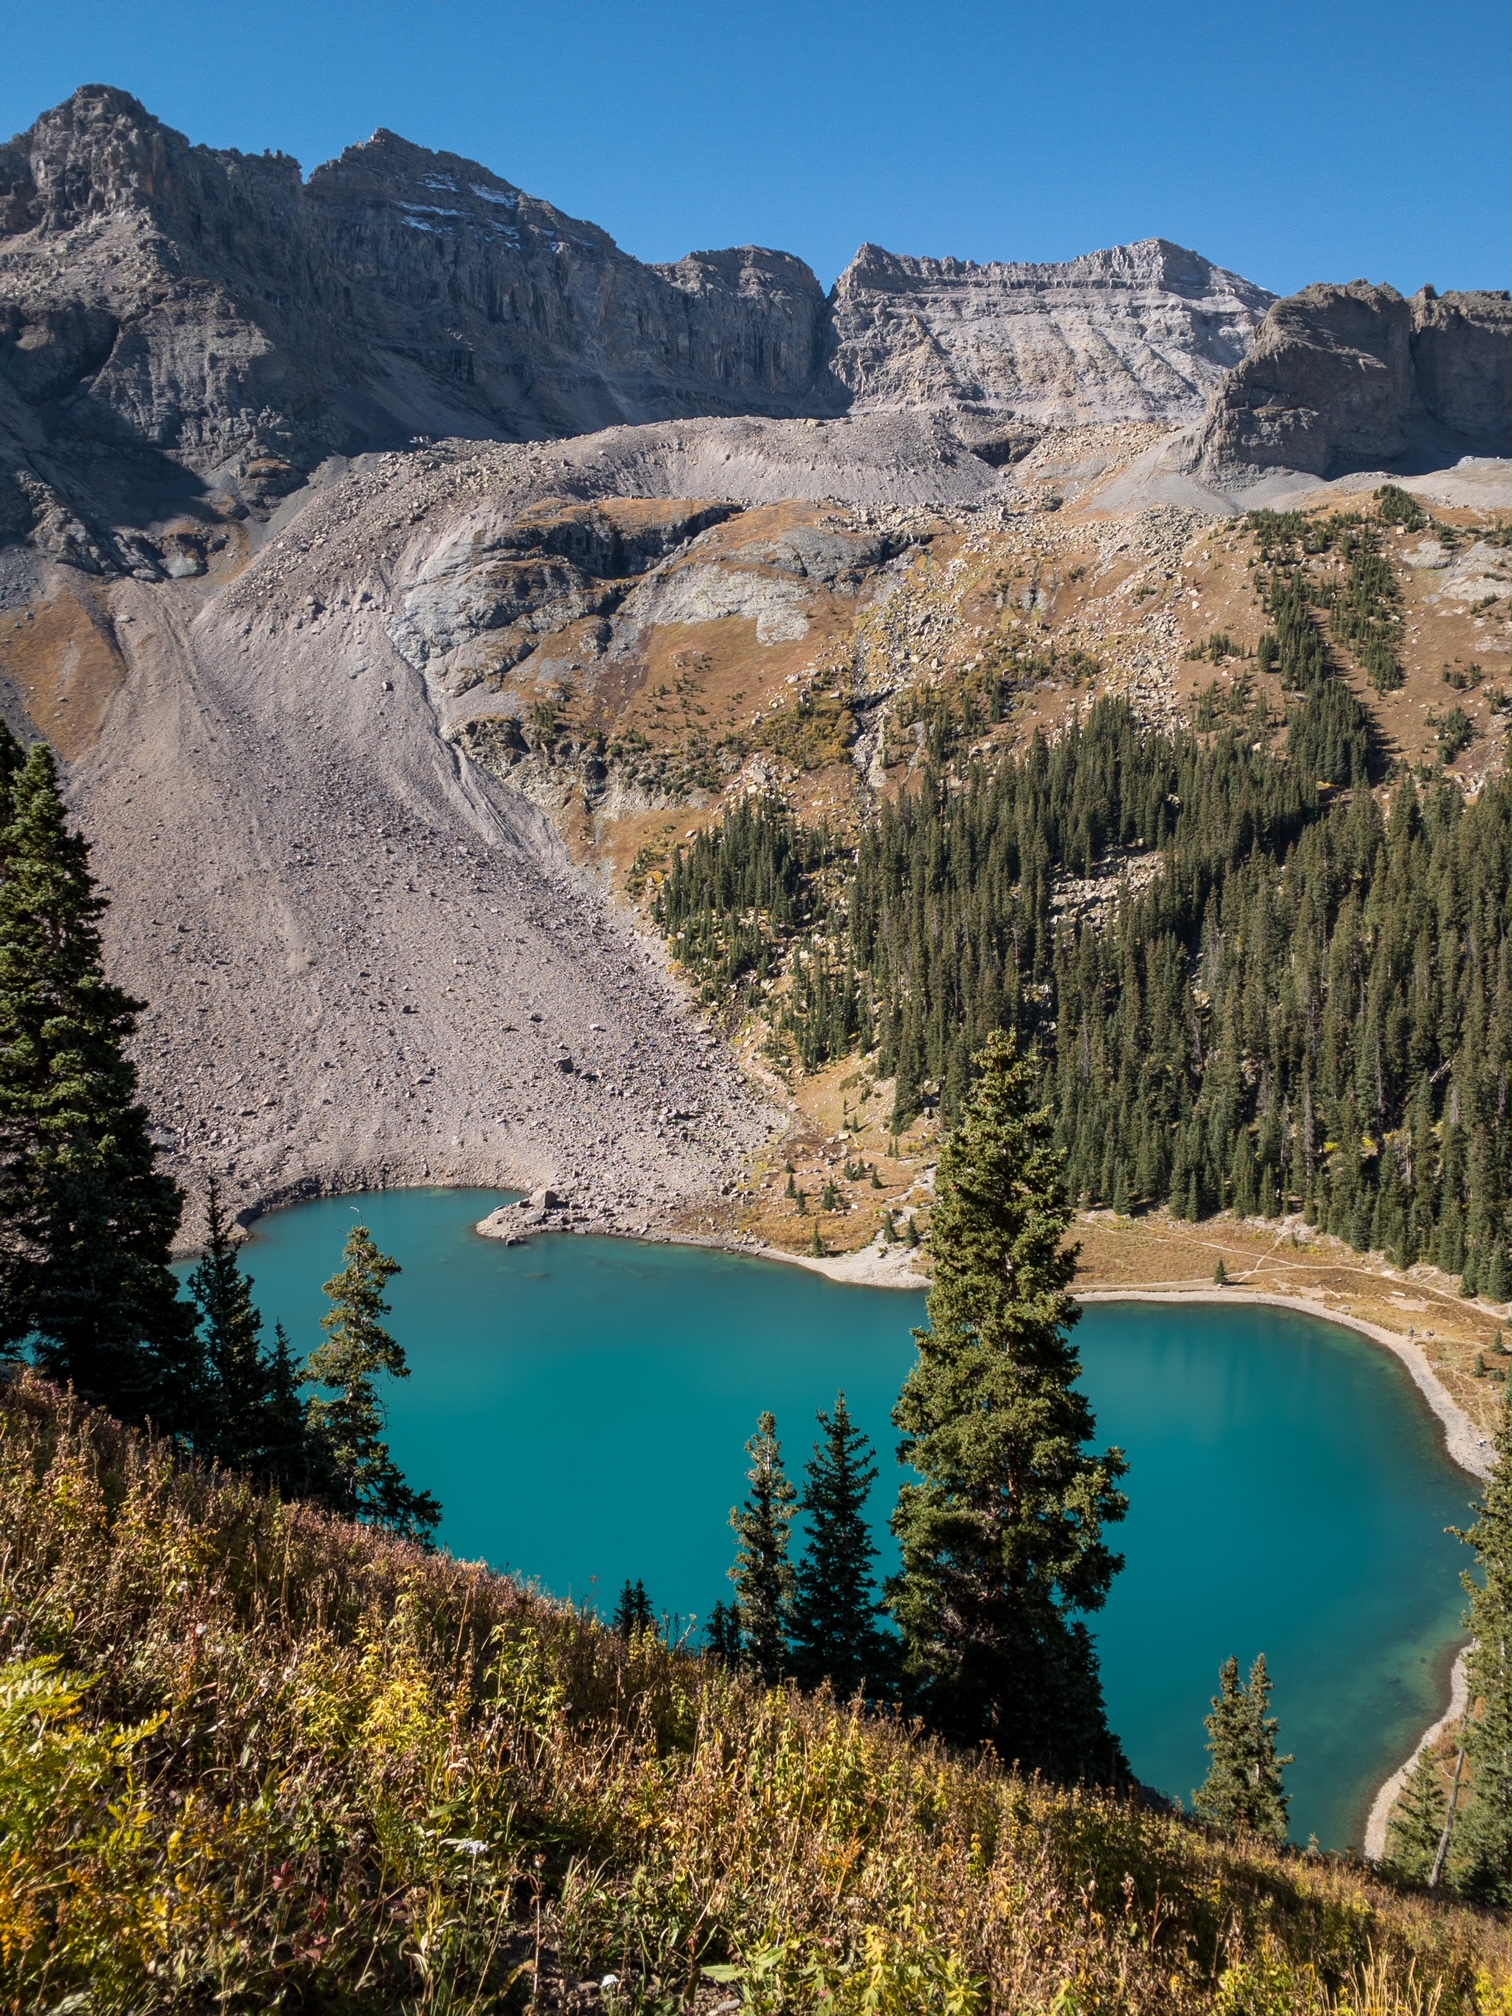
Blue Lakes Trail, outside of Ridgway, Colorado, is an absolute must-do. The trail is located in the Mount Sneffels Wilderness, in the Uncompahgre National Forest. There are three lakes along the trail: the first being the easiest to get to, and in our opinion, the most scenic (pictured here). This trail is great as a day hike or a one or two night backpacking trip, and you can add on climbing Mount Sneffels (14,150 ft) if you have the desire!
We did this trail as a one night backpacking trip and it was absolutely awesome. The trail can be heavily trafficked, as it is so scenic, but the evenings and mornings at the lakes are really special, as all the day hikers clear out, and it becomes much more quiet.
About the Blue Lakes Trail
Distance: 8.7 miles (roundtrip)
Elevation gain: 2,509 feet
Type of Trail: Out and back
Rated: Difficult
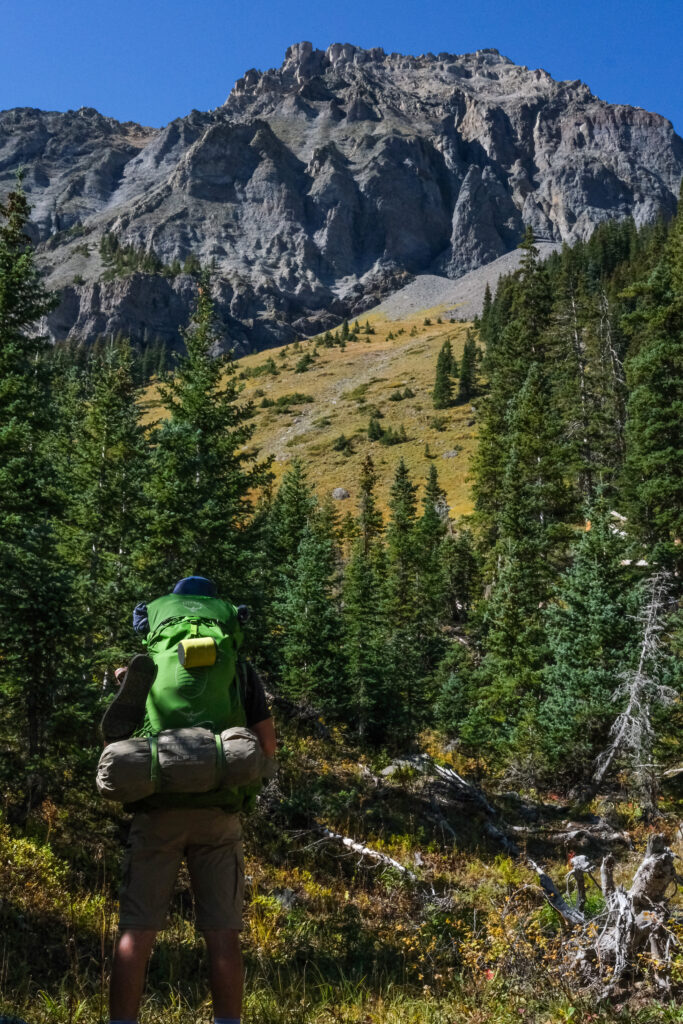
The trail starts at 9,334 feet of elevation off of a dirt road in the Uncompahgre National Forest. The trail quickly ascends and weaves near the river, then up on the hillsides through tall forests and sweeping meadows. We will warn you, the climb can be intense (especially with backpacks), and it doesn’t really let up!
The first climb to the lower lake is about 3.2 miles and 1,600 feet of elevation gain. It is a long 3.2 miles, but it is so worth it! Much of the beginning of the hike will be in the trees, but views will peek out between the branches. You will slowly get better and better views of the peaks ahead and the valley behind you. You will pass a raging waterfall on your left, and you will know you are getting close to the lower lake.
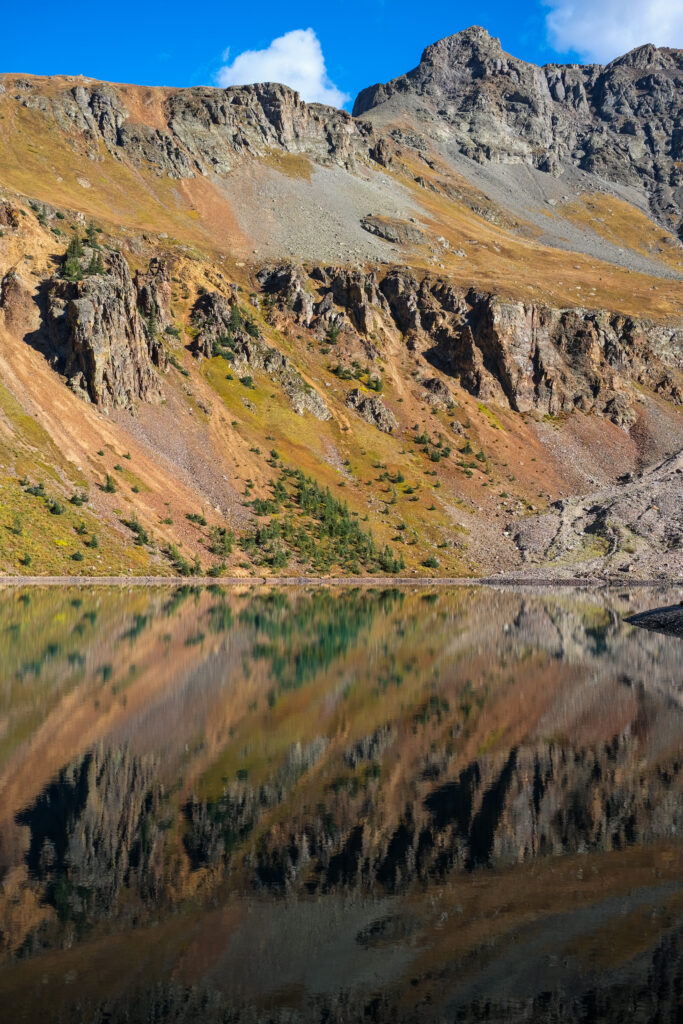
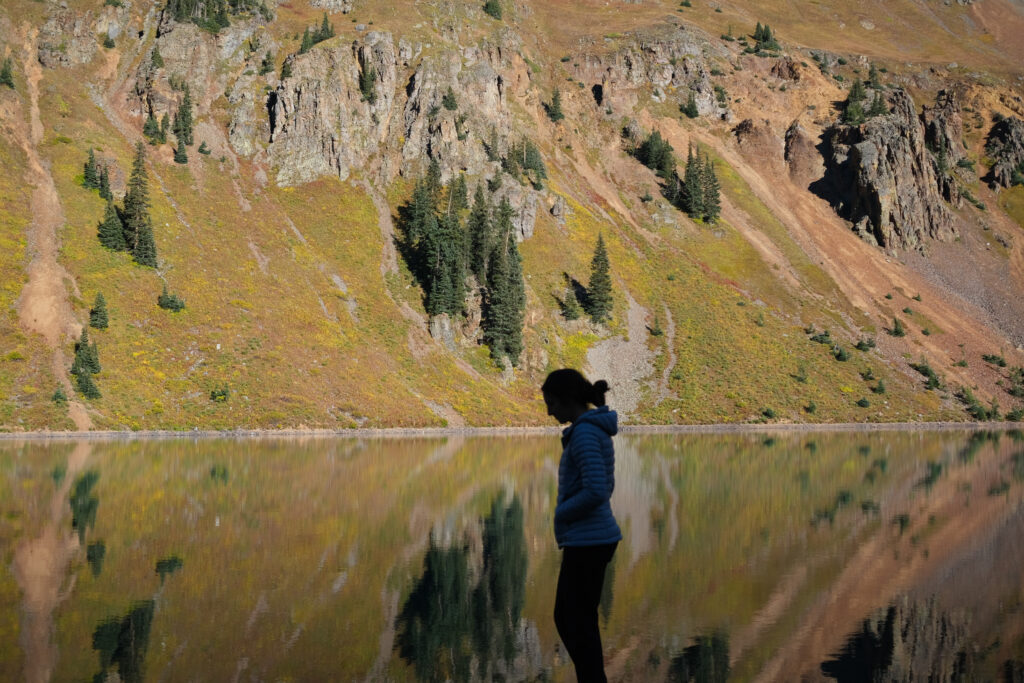
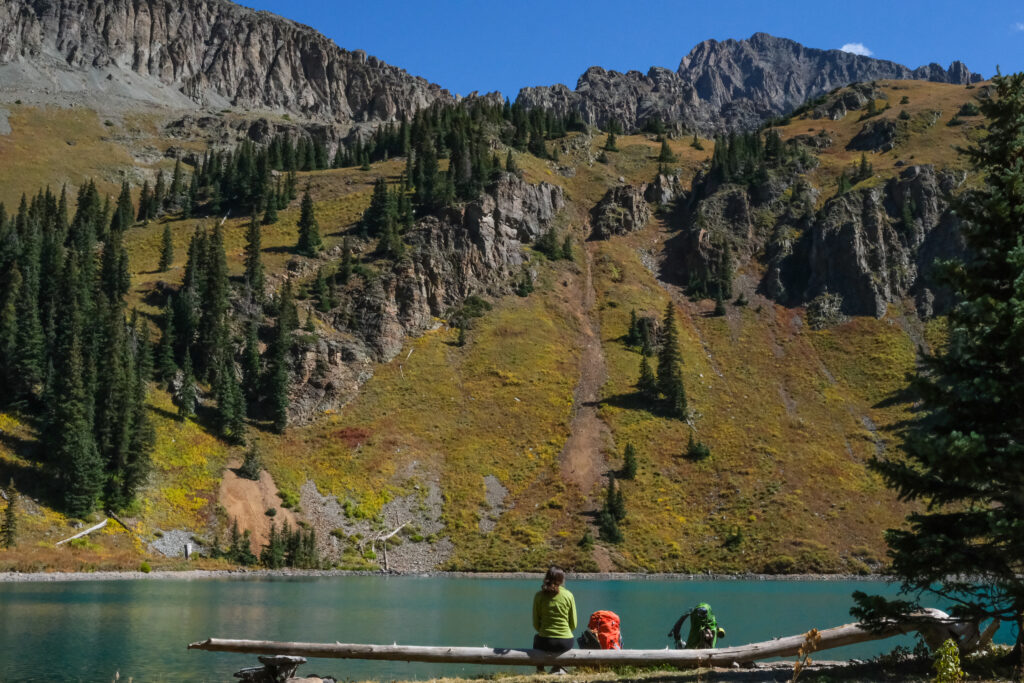
When you arrive at the lower lake, there will be a wooden sign directing you to the lower lake or towards the rest of the trail. You must go see the lower lake, and it would make a great spot for a snack (and a dip during summer months)! There are plenty of logs and rocks to sit on and take a break at this lake, and you will start to get a feel for the blue water. If you can make it here early in the day, or stay later in the evening, the reflections on this lake when the wind is calm are pretty incredible!
This hike can be totally fulfilling to just go to the lower lake! We felt that this lake was the most beautiful of all three, and was by far the highlight of the trip! However, we highly recommend you go even just halfway up the trail to the second lake. This is when the blue really shines. The higher above the lake you get, the bluer the water is.
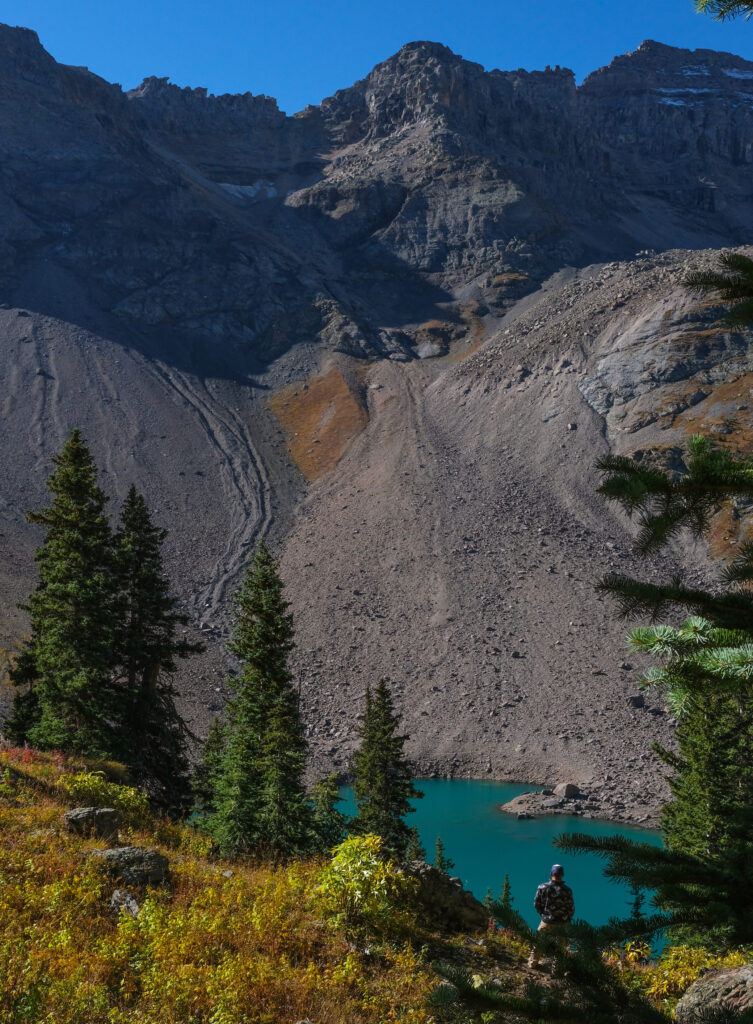
The trail after the lower lake gets very steep, and can be hard to follow in some places. You can hike back to the sign, and then cross the river to begin ascending towards the ridge. You will quickly climb about 650 feet in .6 miles. Watch your footing, and take your time on this climb!
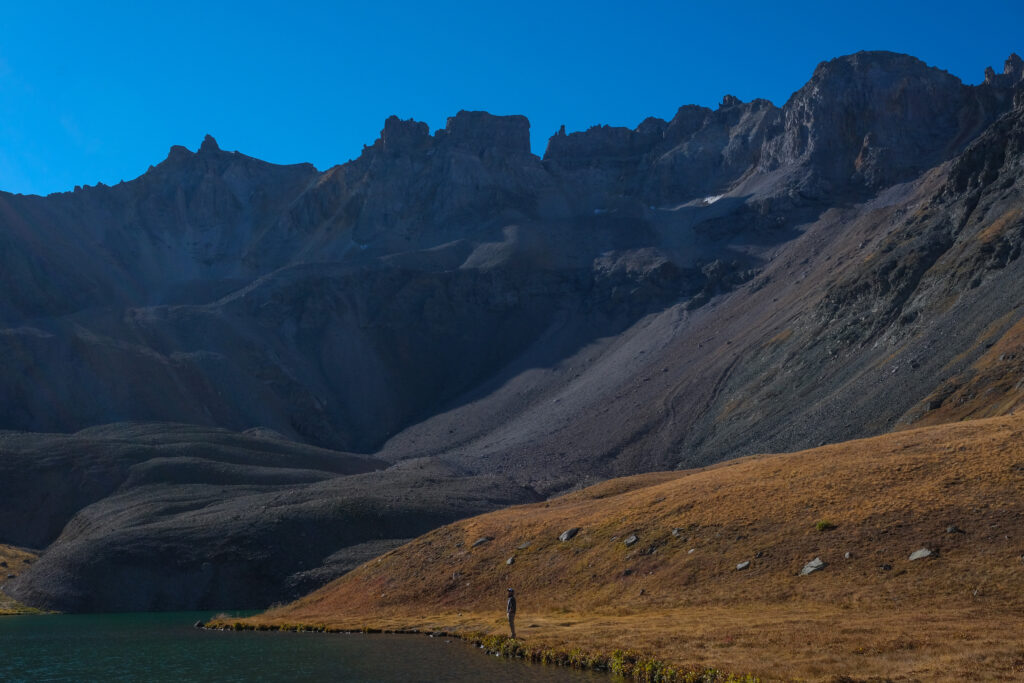
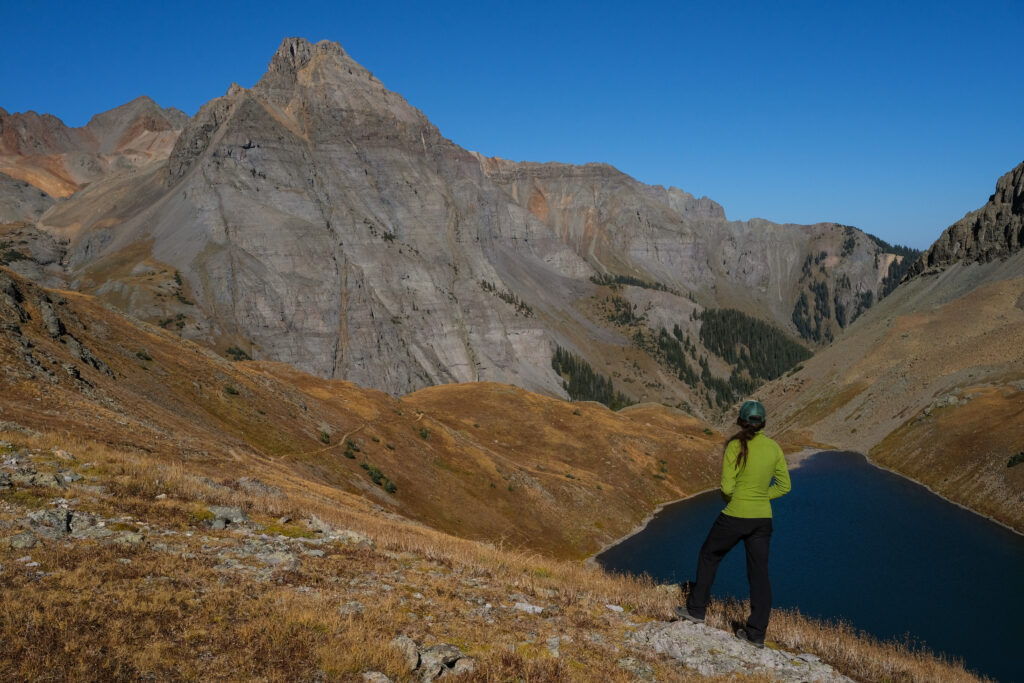
If you make it to the ridge, there are also a couple of incredible viewpoints for snacks and water breaks, and you will be able to look back on lower blue lake (this is the real treat!). Middle Blue Lake will be on your left. From here, the trail becomes much more gradual for the last .4 miles to Upper Blue Lake. Both of these lakes are beautiful and we were glad we hiked up to them! However, Lower Blue Lake totally steals the show. If you continue on this trail, you can climb Mount Sneffels! We will absolutely be doing this next time! Be sure to research routes and possible gear you may need.
Backpacking the Blue Lakes Trail
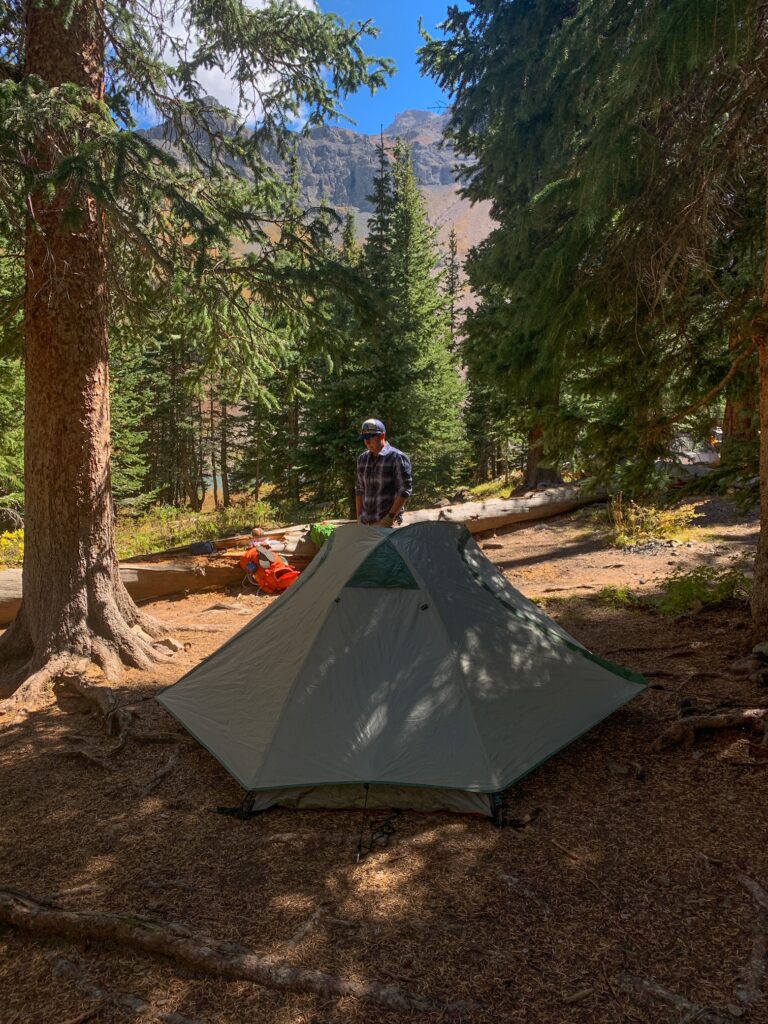
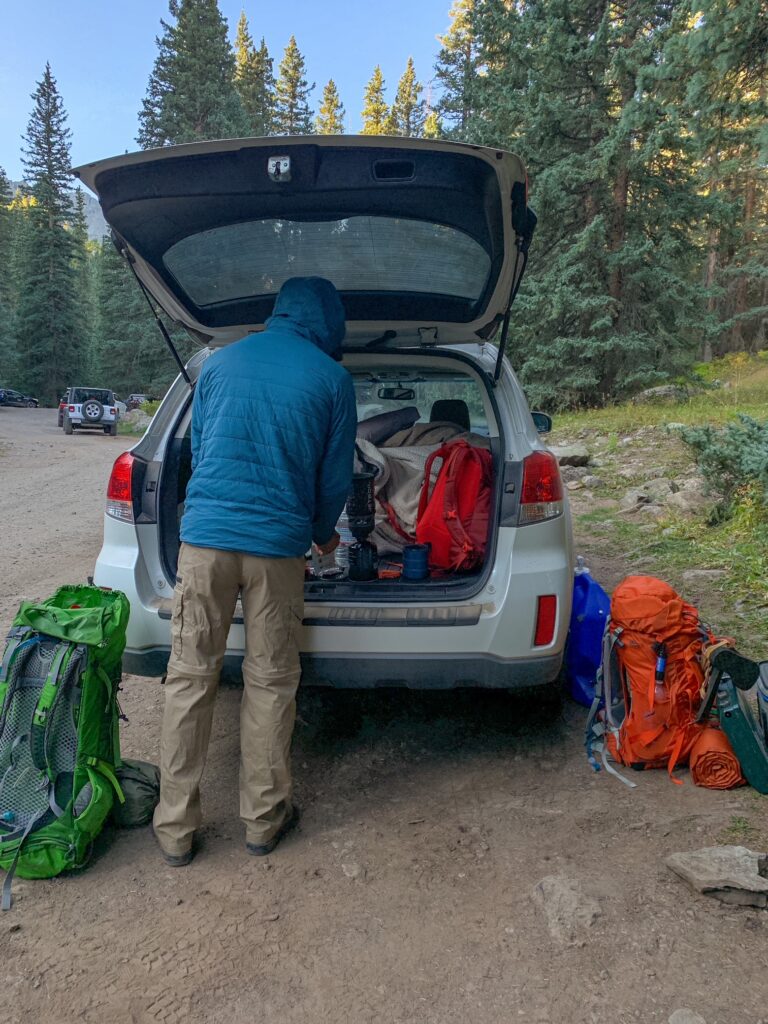
We loved this trail as a backpacking trip, and would highly recommend it to anyone interested! Permits are not required to backpack this trail (at this time). We usually plan our backpacking trips with many more miles to cover than this, and it was really enjoyable to have fewer miles and more time to hang out at the lake and explore! We would not recommend this as a first backpacking trip, especially if you are looking for an easier trail. The trail climbs nearly the entire way to the lake, and could be strenuous for someone who hasn’t backpacked with weight before! We originally saw photos of people camped at the ridge overlooking the lower lake, and set our sights on possibly doing the same! However, Zoe was feeling a little ill when we started the hike, and once we got to the lower lake, we decided to just camp there!
Little did we expect, we are so happy we did! Once we hiked up to the ridge the second day, we realized our campsite was much better at the lower lake. While we didn’t have the view for sunrise, we did get to see all of the same views on our day hike, and felt being by the lower lake was better than being above it. We had ample water access, got to enjoy our dinner and coffee right by the lake, and had plenty of wind protection from the trees. Because the middle lake is so much higher in elevation, there are no trees nearby, and we heard it can get windy in the valley. Plus, we didn’t have to hike up that brutal climb to the middle lake with our backpacks. We highly recommend camping at the lower lake if you do this as a backpacking trip!
There are plenty of campsites near the lower lake to pick from, and there will likely be other campers! You must camp at least 100 feet away from water or any designated trails. Fires are not allowed in Mount Sneffels Wilderness. Bear canisters are not required in this area, but we brought them, and so did the people camping near us! There are not many trees that would work well for hanging food, and we heard about many recent bear sightings in the area. We highly recommend bringing a bear canister on this trail. We use the BearVault 450 on shorter trips, and the BearVault 500 on longer trips!
We set up camp near the lower lake, and hung out by the water for the first afternoon. We explored around the lake and met some other campers. Everyone was so friendly and on a Friday night there were at least 4 other groups camping near the lake. We still felt we had plenty of space and privacy, and it was very quiet! The following morning, we made coffee and watched the sunrise on the mountains. We grabbed some water and snacks and hiked up towards the ridge, and middle and upper blue lakes. We were absolutely amazed at how blue the water looked from up above. Later, we packed up our gear and headed back to our car. We headed towards Telluride to get some burgers and beer, because what better way to celebrate another trip in the books?
Curious about what gear we bring backpacking? Check out this list with links to each piece of gear we use, and why we love it! Also, there’s a free copy to download for your next backpacking trip!
Getting to the Blue Lakes Trail
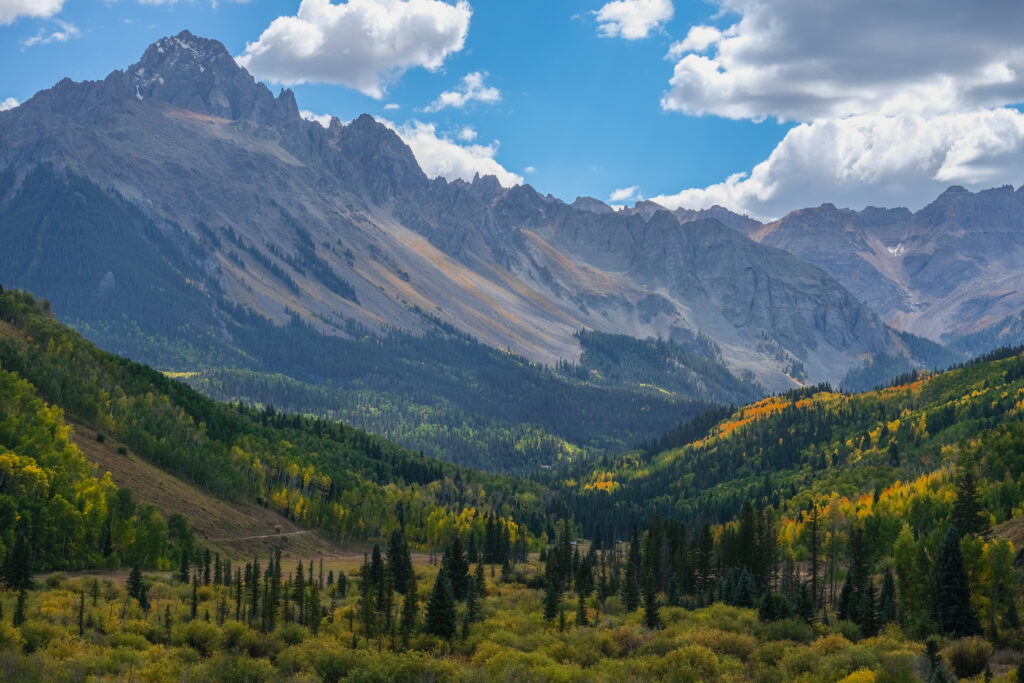
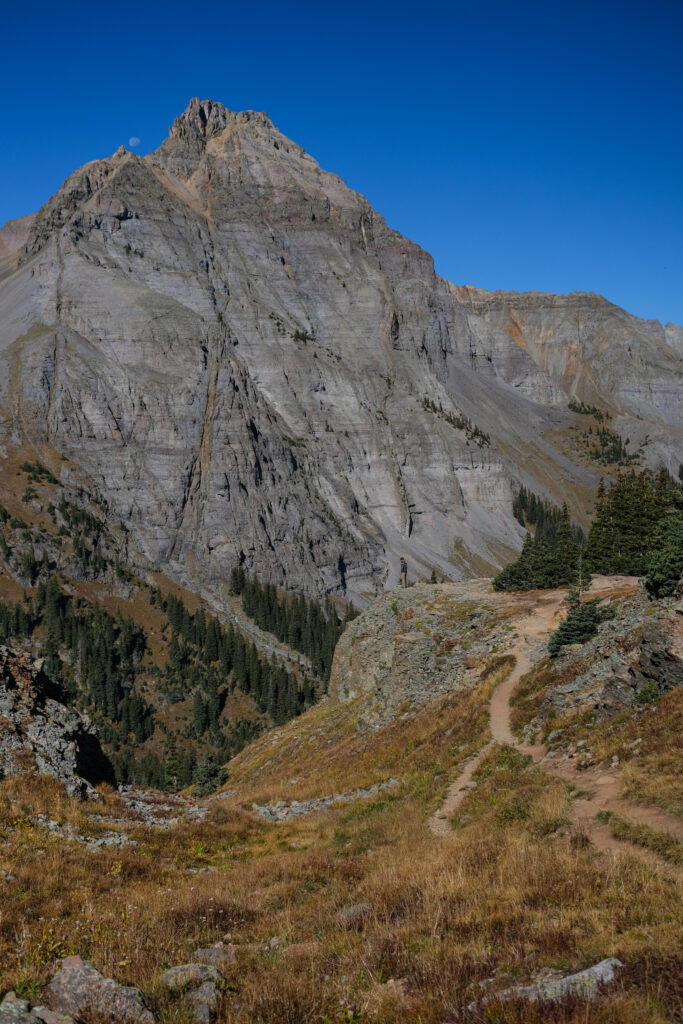
The trailhead is on a dirt road just off of Highway 62. From Ridgway, travel west on HWY 62 out of town. In about 5 miles, turn left on County Road 7 (or Dallas Creek). The trail is about 1.5 hours from Telluride. If you are coming from Telluride, travel west on HWY 145. In about 13 miles, you will take a right at the T intersection onto HWY 62. Travel about 19 miles to County Road 7, and take a right. Two miles into the dirt road, you will stay right on County Road 7 and travel 9 more miles to the parking lot. We did this drive in the dark on the way in, and were absolutely amazed by the views on the way out. One way (in or out) you must see this incredible valley. We also were here just as the leaves were beginning to change, and it was absolutely breathtaking. Mount Sneffels is the mountain on the far left side, and it towers over the peaks below.
This dirt road can be rough in some places, and we recommend bringing a vehicle with higher clearance. We brought our Subaru Outback, and it did fine! There are some potholes that will require careful navigation with a lower car.
Camping Near the Blue Lakes Trailhead
We, and many other people, all camped right at or near the trailhead! This area is national forest land, and is free to camp on. There are many pullouts just before you reach the trailhead, and many were also camped in the parking lot (if they were sleeping in their vehicle). Just be prepared for some early noise and lights passing by, as many hikers start their climb up Mount Sneffels before the sun comes up. Please Leave No Trace, and pack everything out. There is a pit toilet at the trailhead, but no water and no trash cans! You must be prepared to bring it all out with you.
Please Leave No Trace and Keep this Beautiful Area Clean!
This trail is absolutely beautiful and we want hikers to be able to enjoy it for years to come! It is really wonderful that this area doesn’t require permits, and is so accessible. Us taking care of this area and keeping it clean will help keep it accessible for everyone and clean for the next hikers/campers! We were really pleased to see very little trash or traces left behind on this heavily trafficked trail. Lets keep it that way!