
We aren’t photographers (we just play them on IG!). Good news is, our friend Rachel of Wild Sonora Photography is! We take 90% of our photos with our phones. They are convenient, easy to use, and much easier to pack on backpacking trips! Rachel helped us out below with 9 tips on how to capture better cell phone photos, and they have already been helping us improve our own photography!
9 Tips for Better Cell Phone Photos on Your Next Hike
Some people are just naturally gifted at photographing for the ‘gram. For the rest of us who have to work at it, here are 9 tips for taking better cell phone photos of your next scenic landscape.
I’ll be demonstrating with portraits though, since that’s what I do. 😉
Before we dive in, remember to be aware of your surroundings and use caution when photographing in the great outdoors. Also, be sure to practice the 7 leave no trace principles while you’re enjoying and photographing nature.
Now onto the cell phone photography tips!
1. Exposure
A proper exposure (the amount of light that goes into an image) is the foundation of all photography. Too much light (overexposure) or too little light (underexposure) means you lose details in highlights that are too bright, or shadows that are too dark. Since our eyes feast on detail, having a “just right” exposure preserves as much detail, texture, and color as possible. On cell phone cameras, exposure can usually be controlled with a sun or light bulb icon. In bright scenes (like a midday hike or a snowy scene), you might need to lower the exposure, while in darker scenes (like in the middle of a forest with tall trees) you might need to raise exposure. Generally, it is easier to salvage deep shadows than overly bright highlights. So, when in doubt, slightly underexpose.


2. Contrast & Haze Control
Exposure has a lot to do with where you point your camera. Point your camera at the sun and you’ll get a ton of light. Point it away from the sun, and you won’t get as much. Seems basic enough. But look more closely and you may also notice something else that changes when you shift between these positions. The contrast and color change dramatically. Contrast is the range of difference between the lightest and darkest tones in your image. When you point a camera at the sun, you’ll notice a lot more haze (scattered light that looks foggy) and a lot less contrast. In other words, the more your camera points towards the sun, the more your image can look washed out. Some people prefer the look of haze or like being artistic with the glow of the sunshine. I do this from time to time too! But if you want maximum color and maximum detail, keeping the sun out of the frame will go a long way. For this reason, I also find it helpful to track the sun’s path when I am planning a session. Using apps like The Photographer’s Ephemeris or websites like SunCalc allows me to anticipate what the best angle, best time of day, or even best time of year might be for a particular location.


3. Time of day
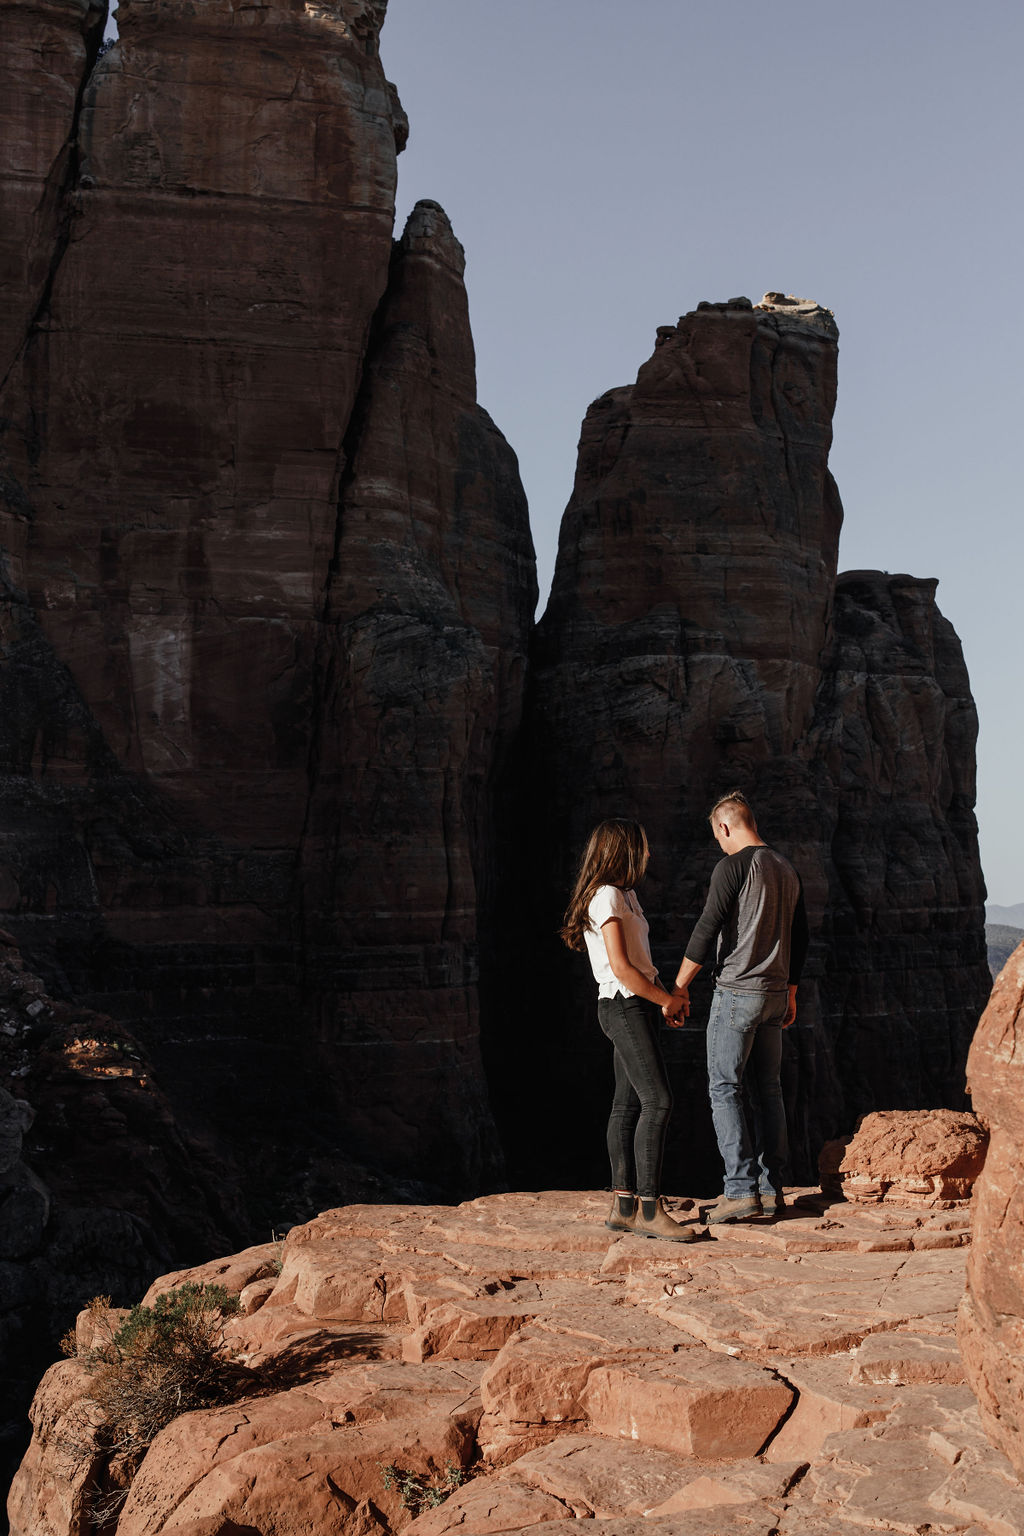
When the sun is up high in the sky, there are fewer shadows happening down below. While this is great for sunbathing, it’s not always desirable for photographers. Why? The most contrast and detail comes from using a full spectrum of light to dark tones. When everything is light, there aren’t many darker tones. We lose a lot of detail, dimension, and texture this way. Those impressive crevices on the faces of mountains? Maybe they disappear at high noon, but wait until the sun sits lower on the horizon (either near sunrise or sunset), and you’ll see how they start to stand out as more shadows appear. There’s a reason we all ooo and ahh over sunsets, right?

You get more texture, color, and dimension in landscape features when the sun lights them from the side, like this photo taken near sunset.
4. A clean lens
If you’re hiking, you probably got a little dirt on you. So does your phone. So does your phone’s camera lens. It’s such a simple step but getting rid of dust particles and smudges (or shooing flies!) before snapping photos can make for a clearer, crisper image. Just be sure to use a proper cleaner solution and a microfiber or lens cloth – or risk ruining your lens forever.

5. Angle change
Many people predictably take photos from the same stance and same height without a second thought. Some of the most interesting photos though, come from finding a different point of view. For example, getting low to the ground or even turning your phone upside down can make that mountain peak appear even bigger. Crouch low, stretch up high, and see what pleasant surprises you find at new angles.

6. Stabilize
Cameras can be sensitive to even the slightest shake. Especially for long exposures or time-lapses, stabilizing your phone will help make for a sharper, clearer shot. Simple body mechanics can go a long way (tuck the elbows, keep arms close in, feet shoulder width apart). But, if you’d rather let a gadget do the work for you, a mini tripod should do the trick.

7. Straighten the horizon
This one is pretty self-explanatory! Unless your intent is to convey action, chaos, or some other dynamic message to your viewers, landscape photos are generally level. It can be a challenge to get the horizon straight though, since many of us take photos handheld and also because lenses are naturally curved (some more than others!). If you’re already planning to bring a tripod, see if you can find one with a built-in bubble level for an immediate fix. Otherwise, a simple post-processing angle adjustment should level things out (you can reference vertical lines like trees if needed). Keep in mind that there can be a difference between the actual and perceived horizon- here’s an explainer. Most often, perceptual horizons win.


8. Edits
There is no one right way to edit a photo. Our preferences for colors, filters, contrast, and other stylistic elements are completely subjective. If you do choose to edit, a couple of things might be handy to keep in mind as you go. Remember: the human eye is drawn to areas that are lightest, have the most contrast, and the most color. Contrast can be added after the fact, but dialing up contrast also dials up color saturation. Unfortunately, color is all too easy to oversaturate, and oversaturated colors can look unreal. If you like to keep things more natural looking, take it easy on color boosting edits or try selectively desaturating any colors that feel a little too neon.


9. Composition
Once the technical basics are mastered, composition is the way to take an image to the next level. Adding compositional elements is a way to add “visual interest.” In other words, your brain gets more enjoyment out of viewing it! One simple compositional trick is to make sure there is some interest built into the foreground, middle ground, and background of an image. Or, try adding leading lines, like a fallen tree or a fence, as a way to lead the eye through different parts of your image. There are entire books dedicated to compositional theory, and there are dozens of ways to incorporate it. Watch how your photos take off once you start composing!

There you have it, my top 9 tips for better cell phone photos of landscapes.
Just remember, as great as cell phone cameras have gotten, there are still some limitations. High detail, low light, large prints- some features just aren’t there yet in the world of cell phone technology. That’s when a professional camera comes in handy. Want to learn more about where cell phone photos fall short? Check out my blog breaking down the key differences between cell phone and pro cameras.
Looking for someone with a professional camera to capture your next adventure? Reach out and tell me what you have planned!
Take an awesome photo after using these tips? Tag us on instagram @wildsonoraphoto and @the_adventureaddicts and share your hikes with us!
Rachel Richards is the owner and photographer behind Wild Sonora Photography, where adventurous families and couples get candid portraits in the great outdoors.